lei25.59
Out-of-Stock

 We deliver to lockers!
Pick up your orders anytime, hassle-free!
 Fast Delivery!
Orders placed by 2:00 PM are shipped the same day. Delivered within 24h!
 2-Year Warranty
Reliable products, worry-free!
 Easy 14-Day Returns
Unused items? No questions asked!
| Board | Name | UNO R4 WiFi |
| SKU | ABX00087 | |
| Microcontroller | Renesas RA4M1 (Arm® Cortex®-M4) | |
| USB | USB-C® | Programming Port |
| Pins | Digital I/O Pins | 14 |
| Pins | Analog input pins | 6 |
| DAC | 1 | |
| PWM Pins | 6 | |
| Communication | UART | Yes, 1x |
| I2C | Yes, 1x | |
| SPI | Yes, 1x | |
| CAN | Yes, 1 CAN Bus | |
| Power | Circuit operating voltage | 5 V (ESP32-S3 is 3.3 V) |
| Input voltage (VIN) | 6-24 V | |
| DC Current per I/O Pin | 8 mA | |
| Clock speed | Main core | 48 MHz |
| ESP32-S3 | up to 240 MHz | |
| Memory | RA4M1 | 256 kB Flash, 32 kB RAM |
| ESP32-S3 | 384 kB ROM, 512 kB SRAM | |
| Dimensions | Width | 68.85 mm |
| Length | 53.34 mm | |
To program the board, you need to install the "Arduino UNO R4 Boards" package.

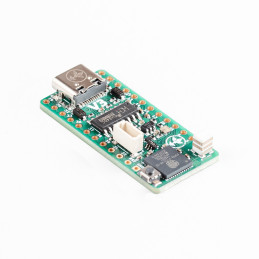
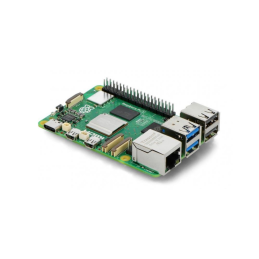
The development board features two different microcontrollers: a Renesas RA4M1 and an ESP32-S3.
By default, the ESP32-S3 module acts as a serial bridge, managing the connection to your computer. It also handles restarting the main MCU, Renesas RA4M1, when needed, for example, when a new sketch is uploaded.
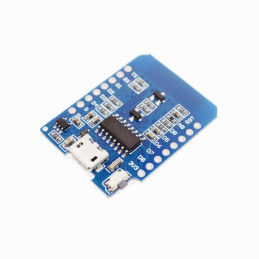
The UNO R4 WiFi also exposes the ESP32 data lines, allowing you to program the ESP32 directly. These lines are available through a 3x2 header at the top of the board.
WARNING:
Please note that the ESP32 comes with preinstalled firmware configured to communicate with the RA4M1 chip. Any direct programming of the ESP32 will erase this firmware and may interrupt communication between the chips until the original firmware is restored.
Ensure the development board is not powered or connected to the PC.
To upload firmware to the ESP32-S3, place the chip into download mode by connecting the download pin to GND.
The download pin is located on the 3x2 header at the top of the board (next to the USB port).

The easiest method is to use a female-to-female jumper wire and connect the indicated pins as shown above. At this moment, the board must be powered off. Once the pins are connected, plug the board into the PC and remove the jumper cable.
Check Device Manager under Universal Serial Bus devices, where it should appear as USB JTAG/serial debug unit.
Download and extract the .ZIP file available at this LINK
Open your system's terminal inside the extracted folder.
Hold ⇧Shift and right-click in an empty space within the extracted folder. In the context menu, select Open command window here / Open PowerShell window here.
Run the command: binespflash write-bin -b 115200 0x0 firmwareUNOR4-WIFI-S3-0.4.1.bin
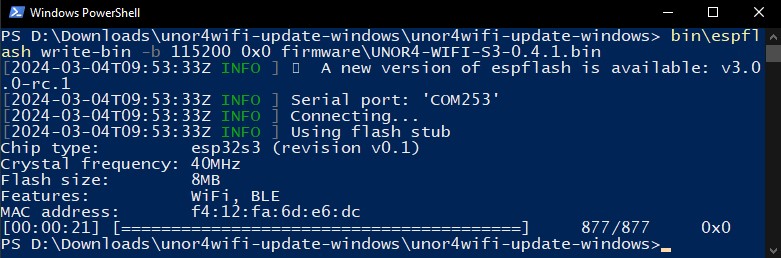
After executing the command, disconnect and reconnect the development board to your PC.
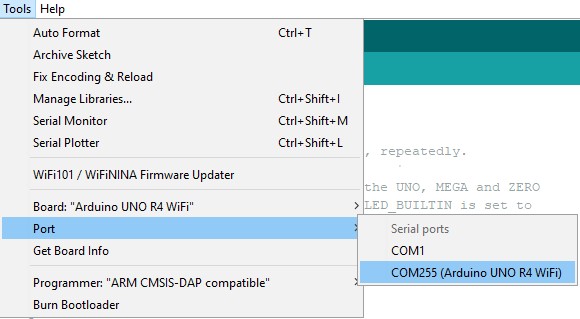
A new COM port should appear in Device Manager, which you can now use to program the UNO R4 WiFi board.
1x UNO R4 WiFi development board
Your review appreciation cannot be sent
Report comment
Report sent
Your report cannot be sent
Write your review
Review sent
Your review cannot be sent
Reference: GLBDOD_FDP-FF-40x10
Reference: DQYNCA_FDP-FF-40x20
Reference: OTGKMP_FDP-FM-40x10
Reference: ZCBOZH_FDP-FM-40x20
Reference: KIT-BB830
check_circle
check_circle