

 We deliver to lockers!
Pick up your orders anytime, hassle-free!
 Fast Delivery!
Orders placed by 2:00 PM are shipped the same day. Delivered within 24h!
 2-Year Warranty
Reliable products, worry-free!
 Easy 14-Day Returns
Unused items? No questions asked!
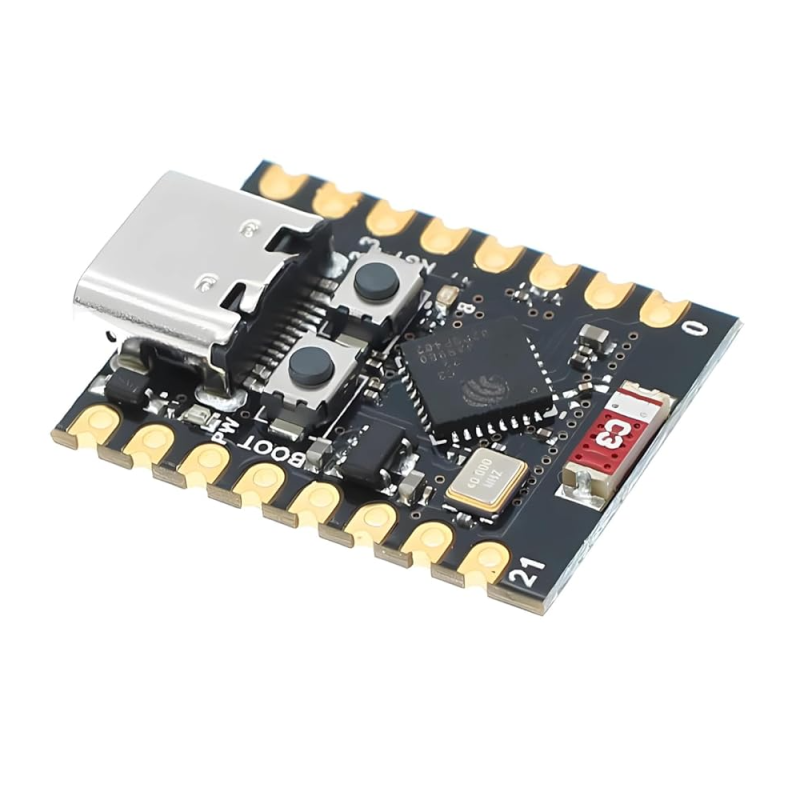
This development board is perfect for smaller projects that require a few digital or analog pins.
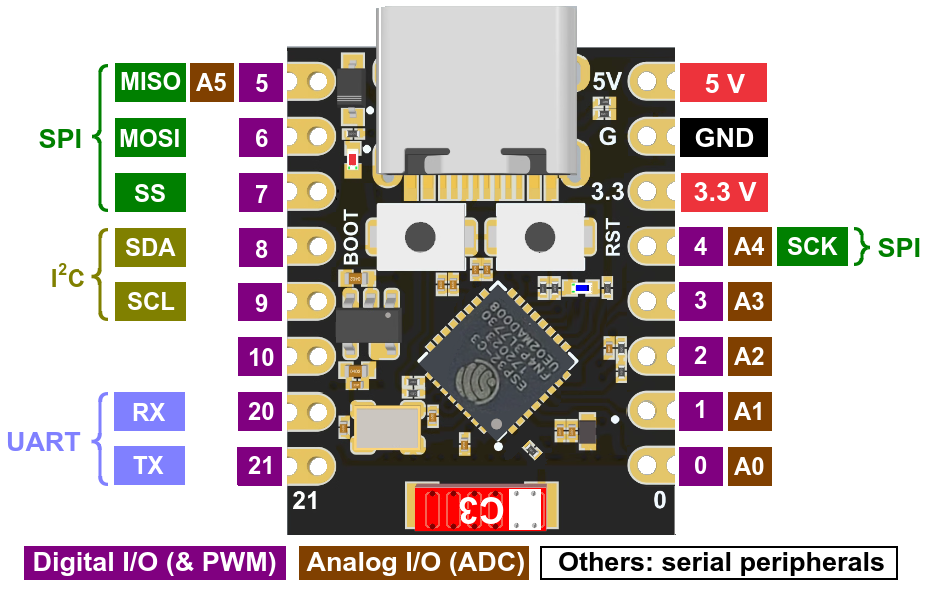
It can communicate through the following communication protocols: SPI, UART, and I2C.
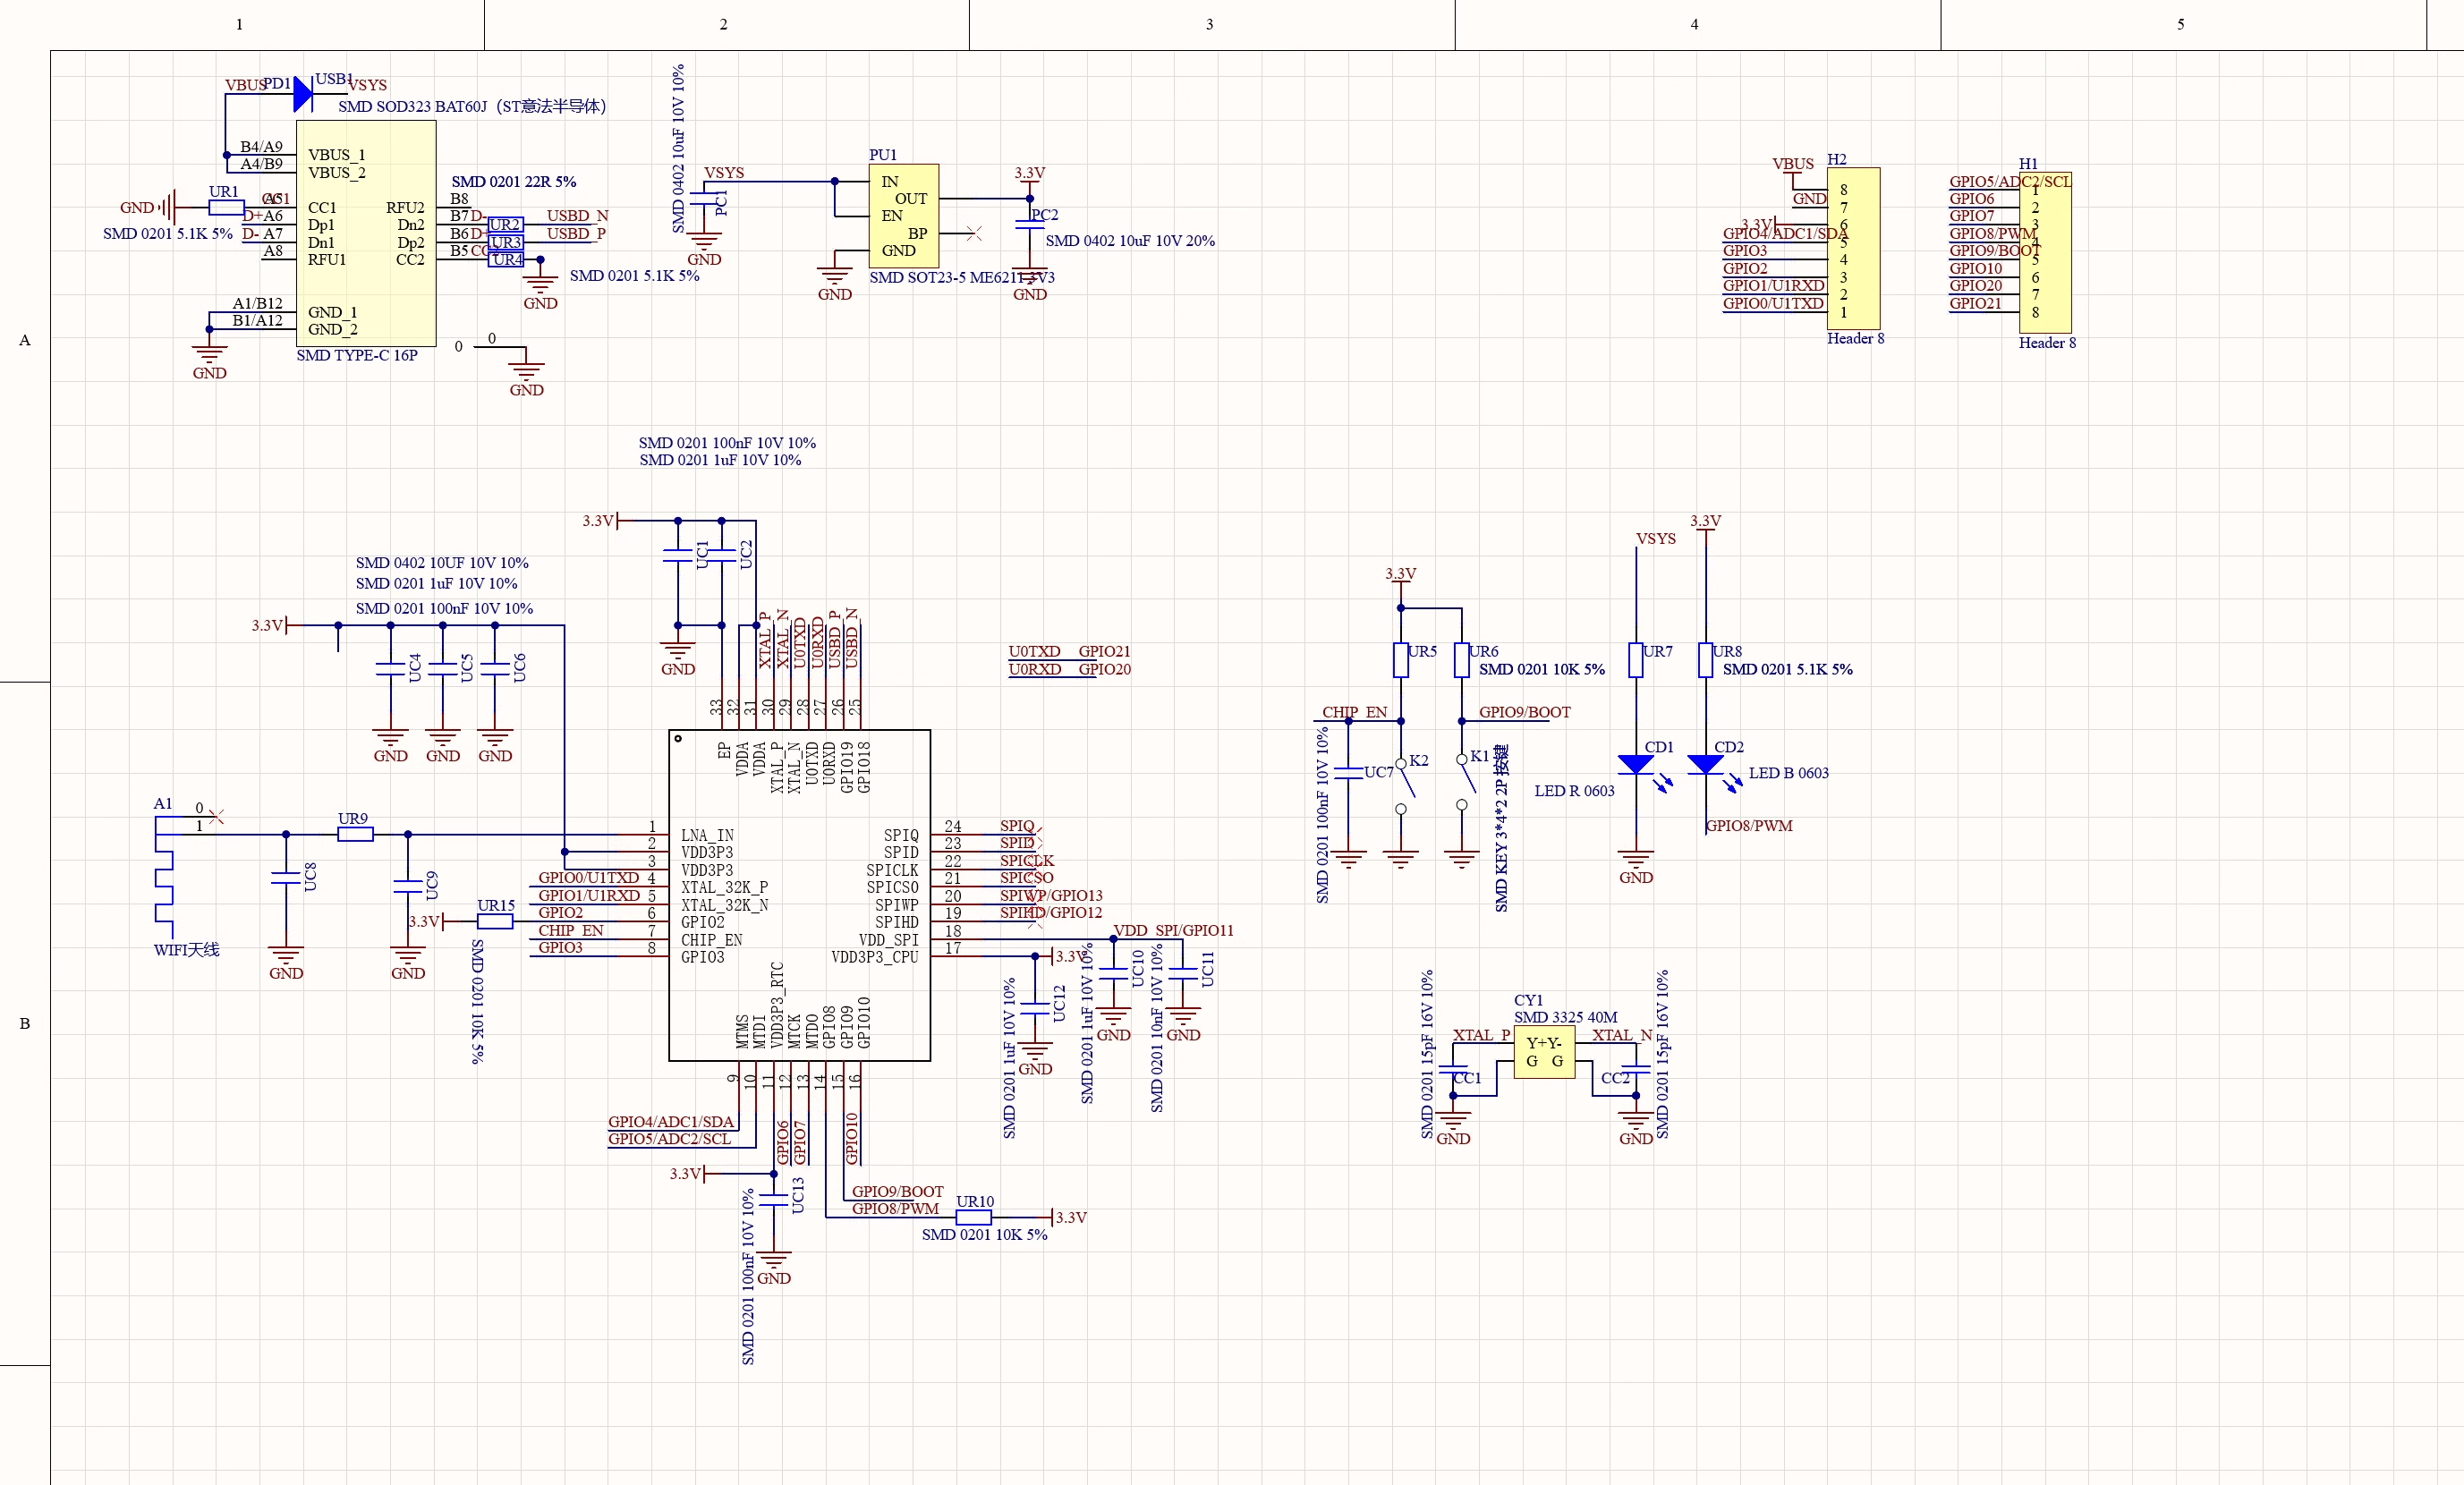
Microcontroller: ESP32-C3 FH4 (32-bit RISC-V single-core processor, up to 160 MHz)
Power Supply (USB): 5V
Digital I/O Pins: 13 (of which 5 are analog)
Flash Memory: 4MB built-in SPI FLASH
WiFi: chip antenna 2.4GHz
To perform this example, you will need the following:
1x ESP32-C3 Super Mini Development Board || Reference ZWIXUC_ESP32-C3_super_mini
Link: Arduino IDE
Before connecting the board, start by downloading Arduino IDE 1.8.x from the link above, according to your preferences and operating system.
First, you will need to download a set of boards in Arduino IDE, so after opening Arduino, go to File->Preferences, and in the "Additional Boards Manager URLs" section, attach the following URL:
https://raw.githubusercontent.com/espressif/arduino-esp32/gh-pages/package_esp32_dev_index.json
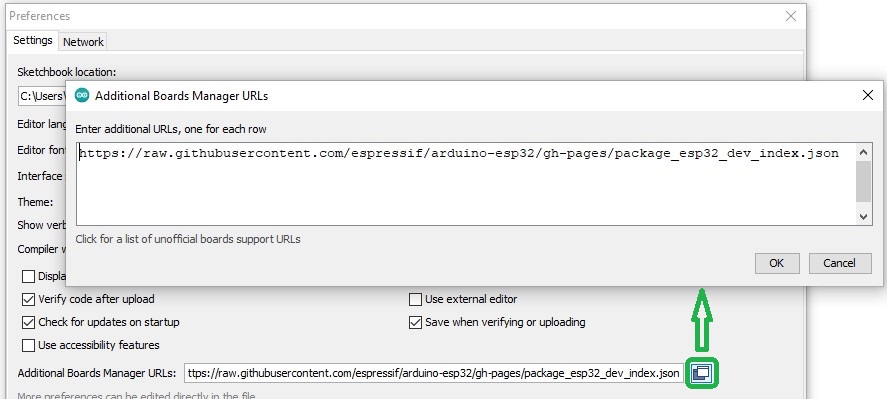
Click OK, then open "Tools"->"Board: ", and from the drop-down list, select the "Boards Manager..." button.
Search for "esp32", and the "esp32 by Espressif Systems" package should appear in the list. Click install and wait for it to finish installing.

Next, go to "Tools"->"Board"->"ESP32 Arduino" where different Arduino-compatible ESP32 boards will be displayed. Choose "ESP32C3 Dev Module" from the list.

After selecting the board, also in the tools menu, change the "USB CDC On Boot:" option to "Enabled" to allow code uploading without the need to enter the boot mode of the board.
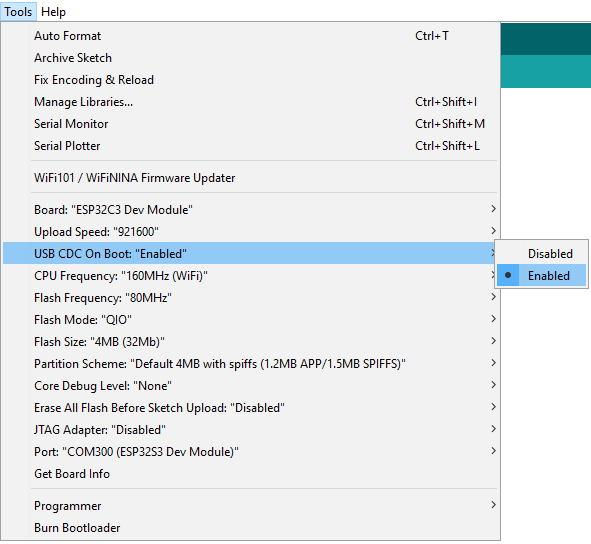
In Arduino IDE, from the "Tools -> Port" menu, select the new port that appeared in Device Manager once the board is connected.
If you have multiple ports and are not sure which one is the ESP32-C3 Super Mini, press "RESET", disconnect the board from USB, then check the "Ports" menu in Device Manager to see which one appears.
Copy the code below and upload it to the development board:
|
#define LED_PIN 8 // the setup function runs once when you press reset or power the board // the loop function runs over and over again forever |
After uploading, the LED connected to digital pin 8 will blink with a delay of one second.
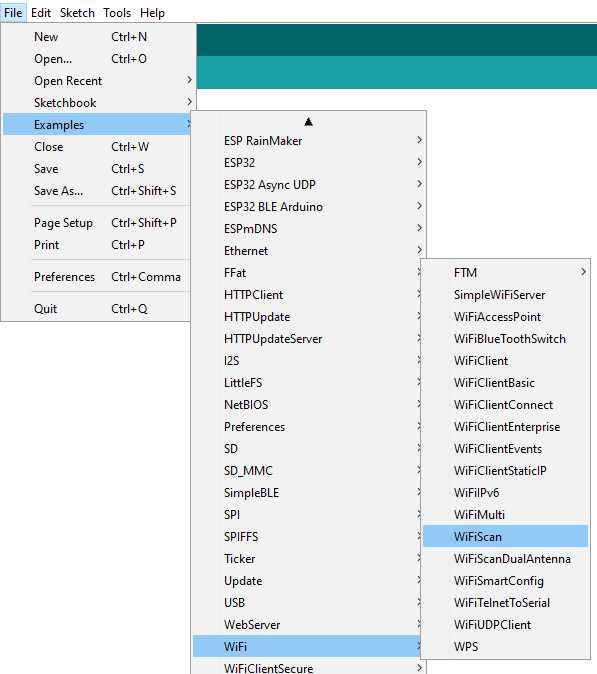
Select Files->Examples->Wifi->
After uploading, open Serial Monitor and set the baud rate to the value in the code (115200).
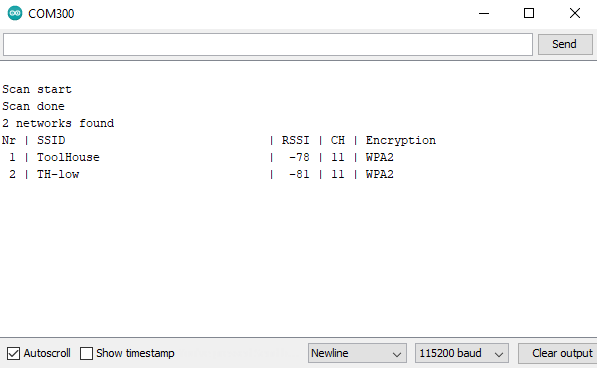
The available WiFi networks will be scanned and displayed as shown above.
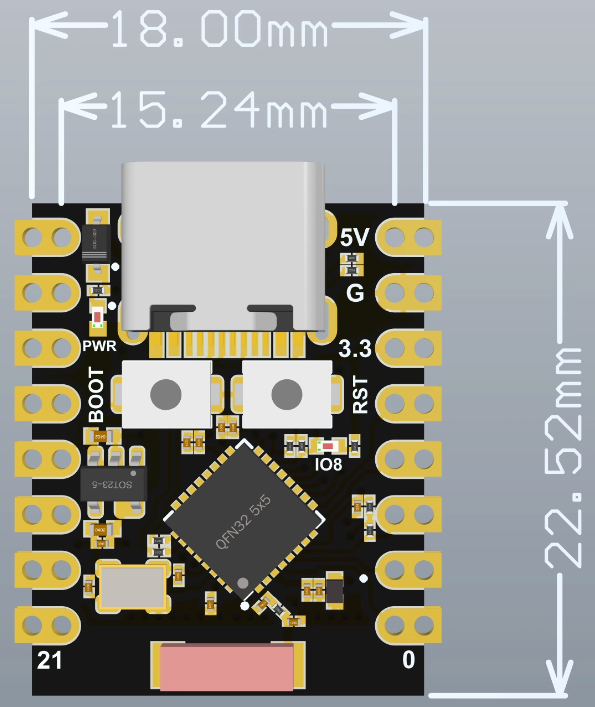
1x piece ESP32-C3 Super Mini Development Board
2x pieces 8-pin male header with 2.54mm pitch
Your review appreciation cannot be sent
Report comment
Report sent
Your report cannot be sent
Write your review
Review sent
Your review cannot be sent

check_circle
check_circle