- Reduced price


 We deliver to lockers!
Pick up your orders anytime, hassle-free!
 Fast Delivery!
Orders placed by 2:00 PM are shipped the same day. Delivered within 24h!
 2-Year Warranty
Reliable products, worry-free!
 Easy 14-Day Returns
Unused items? No questions asked!
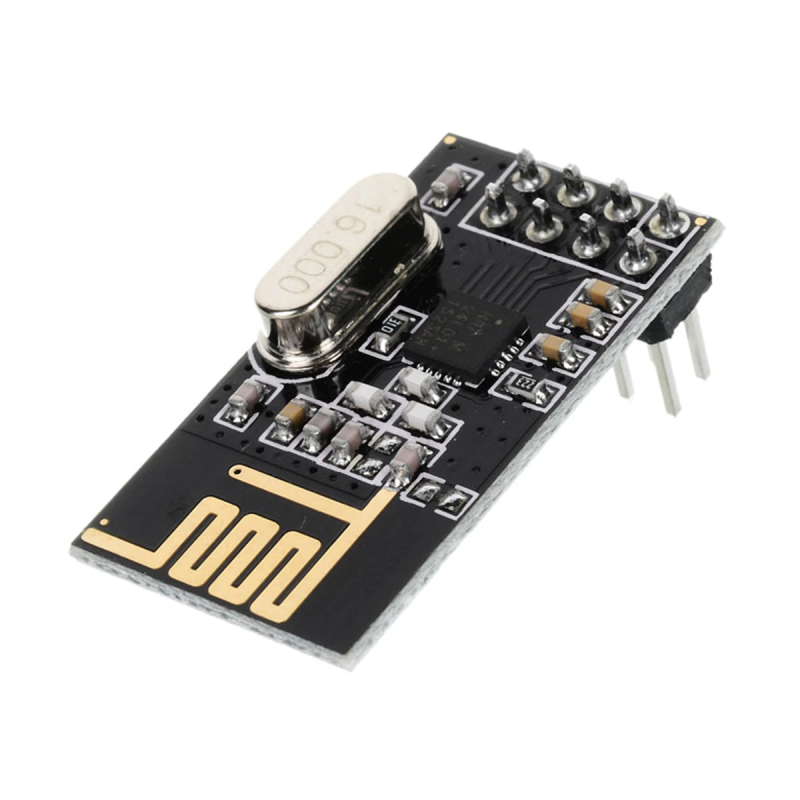
Wireless transceiver operating in the 2.4 GHz free band.
This is not a Wi-Fi device; it just operates at the same frequency. To create a network, you need at least two modules.
It can be used for implementing custom architectures or protocols.
Maximum RX/TX current: < 14mA
Can operate in Ultra Low Power mode.
Power supply voltage: 1.9 - 3.6V.
It is 5V tolerant on the logic side.
For this example, you will need the following:
2x Wireless Module (not Wi-Fi) NRF24L01+ || Reference LSNACZ_NRF24L01+
2x UNO Development Board || Reference TXVMOK_DB-UNO-R3
various wires needed for making the electrical connections
PINOUT:
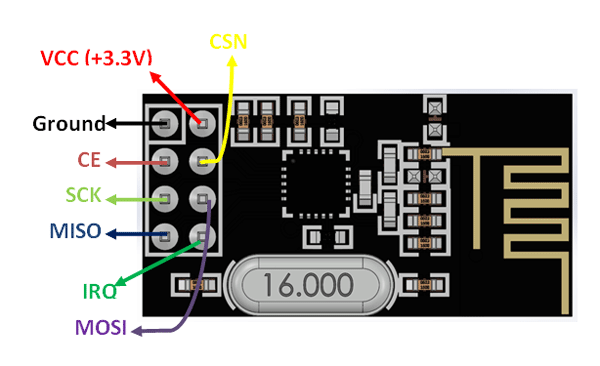
Required Connections:
The connections in the image below must be made the same way for both interfaces (receiver and transmitter).
The CE and CSN pins can be connected to any other digital pins, but they must correspond to those defined in the code.
The IRQ pin is not connected to the UNO development board.
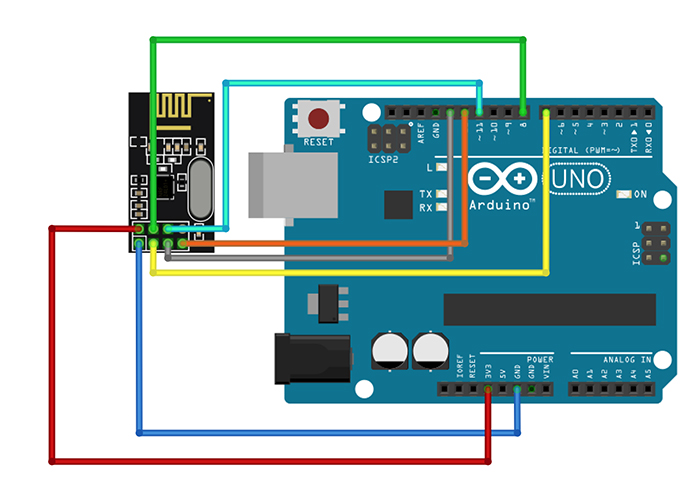
After making the two assemblies, the codes must be uploaded to the development boards.
Programming in Arduino IDE:
To program the development boards, we need the "RF24" library, which can be found in the Arduino IDE, Tools->Manage Libraries... menu, as in the following image:

Once the library is installed, go to the File->Examples menu and look for the RF24 section where you choose the "GettingStarted" example.
Programming the RECEIVER board:
The example should be uploaded to the board used for reception without any code modifications.
Programming the TRANSMITTER board:
If you have both boards connected to the same PC, to open the "Serial Monitor" console on the other port, open another instance of the Arduino IDE by holding down the "Shift" key on your keyboard (this way, you can monitor the functionality of both codes at the same time).
For the transmitter, you need to change the value of the "role" variable from "false" to "true" in the following line:
"bool role = false; // true = TX role, false = RX role"
After modification, the line will look like this:
bool role = true; // true = TX role, false = RX role
Now we can upload the example to the UNO board that will control the transmission.
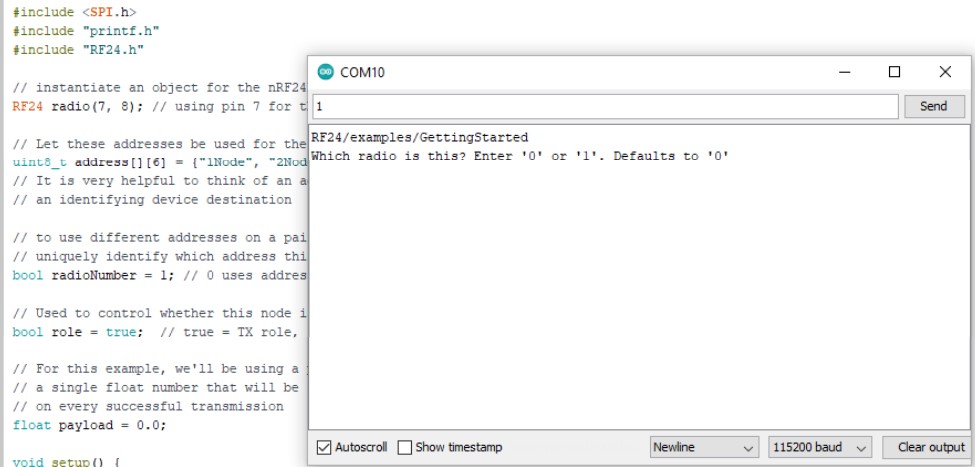
In the Serial Monitor of both development boards, you need to enter the values 1/0 to select the connection as shown in the images below:
WARNING: You must select the appropriate baud rate specified in the code (in this case, 115200).
For the TRANSMITTER:
For the RECEIVER:
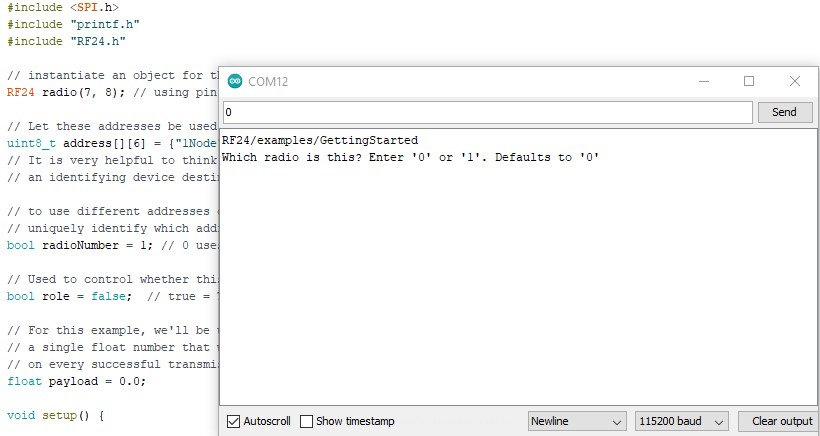
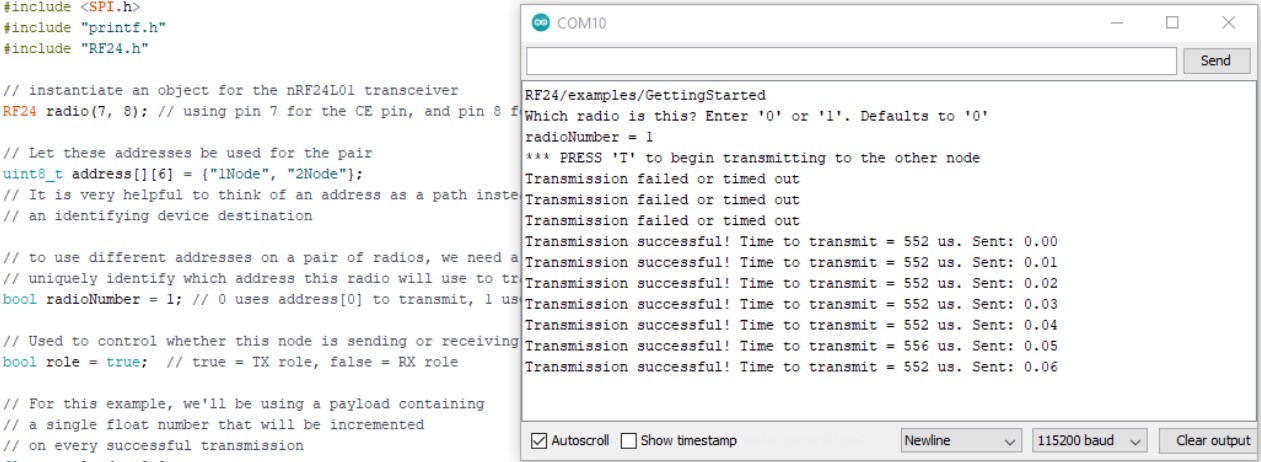
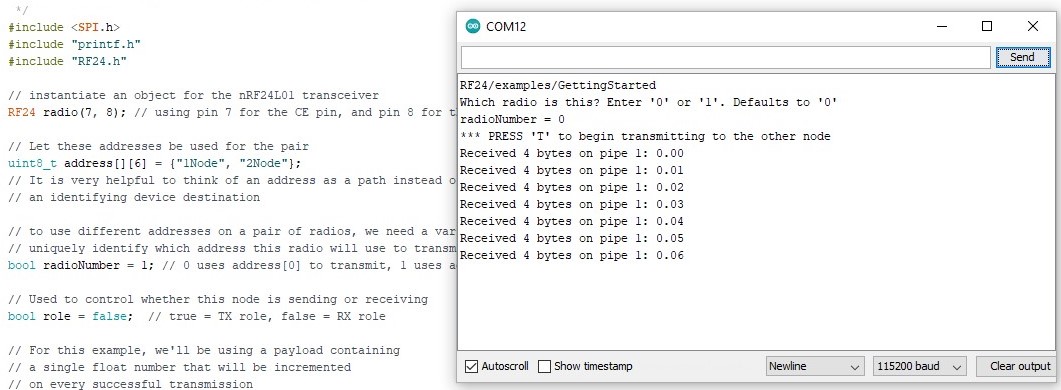
After entering the corresponding values in each Serial Monitor, the connection between the two devices will begin, incrementing the "payload" variable of type float with each successfully completed transmission.
For the TRANSMITTER:
For the RECEIVER:
1x wireless module NRF24L01+
Your review appreciation cannot be sent
Report comment
Report sent
Your report cannot be sent
Write your review
Review sent
Your review cannot be sent
Reference: EMKVEZ_AAA
Brand: GroundStudio

check_circle
check_circle