Product Description
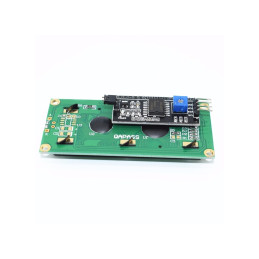
The 0.96” OLED display with SSD1306 driver is the classic choice for Arduino and microcontroller projects when you want a small, crisp, and easy-to-control screen. The panel has a 128×64 resolution and Yellow/Blue color zones (usually ~1/3 yellow, ~2/3 blue), which gives it a modern look without complicating the software — from a coding perspective, the display remains monochrome. Communication is via I²C, so you only need two data lines (SCL/SDA) plus power. Text and graphics (icons, simple charts, logo) render with excellent contrast, visible from almost any angle.
Ideal for: simple menus, sensor status, clocks, thermometers, portable projects, counters, visual debugging.
Technical Details
- Active diagonal: 0.96”
- Resolution: 128 × 64 pixels
- Technology: OLED (self-emissive, high contrast, no backlight)
- Panel colors: Yellow/Blue (zone distribution is hardware-defined; content is monochrome)
- Interface: I²C (IIC)
- Controller: SSD1306
- Pins: GND, VDD (VCC), SCL, SDA (4 pins, 2.54 mm pitch)
- Supply voltage: 3.3 V – 5 V (typical)
- Usual I²C address: 0x3C (depending on batch, some boards may allow 0x3D)
- Power consumption: very low (typical for OLED, no backlight)
- Compatibility: Arduino/AVR (Uno, Nano, Pro Mini), ESP8266/ESP32, STM32, Raspberry Pi Pico, etc.
- Module dimensions: approx. 27 × 27 × 4 mm (indicative, may vary slightly by manufacturer)
- Mounting: mounting holes for M2 screws (where provided)
Wiring Diagram & Code Example (Arduino)
Quick wiring (Arduino UNO)
- OLED GND → Arduino GND
- OLED VDD → 5V (or 3.3V)
- OLED SCL → A5 (SCL)
- OLED SDA → A4 (SDA)
On modern boards (e.g., Arduino Leonardo/Mega/ESP32) use the dedicated I²C pins labeled SCL/SDA. If you use 3.3 V, power the logic at 3.3 V as well.
Code example (Adafruit libraries)
- Install from Library Manager: Adafruit SSD1306 and Adafruit GFX Library.
- Upload the sketch below (address 0x3C, 128×64):
#include <Wire.h>
#include <Adafruit_GFX.h>
#include <Adafruit_SSD1306.h>
#define SCREEN_WIDTH 128
#define SCREEN_HEIGHT 64
#define OLED_RESET -1 // I2C reset, unused
#define OLED_ADDRESS 0x3C // common address for most modules
Adafruit_SSD1306 display(SCREEN_WIDTH, SCREEN_HEIGHT, &Wire, OLED_RESET);
void setup() {
Wire.begin(); // start I2C
if (!display.begin(SSD1306_SWITCHCAPVCC, OLED_ADDRESS)) {
for (;;); // halt if the display isn’t found
}
display.clearDisplay();
// Simple text
display.setTextSize(1);
display.setTextColor(SSD1306_WHITE);
display.setCursor(0, 0);
display.println(F("ArduShop - OLED 0.96\""));
display.println(F("SSD1306 I2C 128x64"));
display.display();
delay(1500);
// Graphics: rectangle and circle
display.clearDisplay();
display.drawRect(0, 0, SCREEN_WIDTH, SCREEN_HEIGHT, SSD1306_WHITE);
display.fillCircle(SCREEN_WIDTH/2, SCREEN_HEIGHT/2, 12, SSD1306_WHITE);
display.setCursor(10, 50);
display.setTextSize(1);
display.println(F("Status: OK"));
display.display();
}
void loop() {
// example: small progress bar effect
static int w = 0;
display.fillRect(10, 40, w, 8, SSD1306_WHITE);
display.display();
delay(60);
w += 2;
if (w > 108) {
display.clearDisplay();
display.drawRect(8, 38, 112, 12, SSD1306_WHITE);
w = 0;
}
}
Note: the Yellow/Blue portions are hardware-defined; there are no software commands to change the colors. The displayed content is monochrome, but will appear yellow/blue depending on the zone it falls into.
Package Contents
- 1 × 0.96” I²C OLED Module, 128×64, SSD1306, 4 pins (GND, VDD, SCL, SDA)